BY DANIEL GREEN
Retired Technical Services Manager, National Cement
MASONRY TECH TOPIC:
Leaking Masonry Walls /
Leaking Mortar Joints
Additional Resources
On so many complaints of leaking walls it is so apparent that the mortar is, in fact, the culprit. But it is the fact that not enough mortar has been put into the joints.
Bed joints for brick walls: these joints must be spread uniformly thick. Furrowing must be kept to a minimum, if performed at all, as some building codes prohibit furrowing. As the bricks are put/shoved into place, their weight and the weight of the coursed above will help to compact the mortar and help promote a water resistant joint. These efforts will provide a “void free” joint, not allowing collection areas for water that could cause areas of freeze damage or embedment corrosion.
Head Joints for brick walls: These joints seem to be more susceptible to water leakage than bed joints. Needless to say, if they are not filled full, (full head joint) there will be mortar void areas which provide channels for water to run to the inside face of the wall / building.
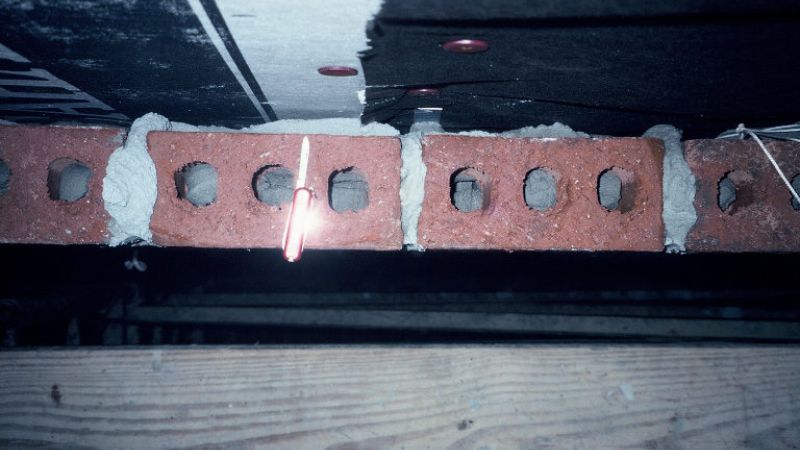
During one of my early on, leaking wall inspections, I was led to the attic space of a new house. The builder had already torn off the styrofoam sheething exposing the interior face of the brick. The wall certainly was leaking, as there were kitchen baking pans on the attic floor to catch the water. Interestingly enough, I could see daylight coming through several head-joint areas. I figured if the light could come through, so could the rainwater. Again, it was a mortar problem…not enough of it.
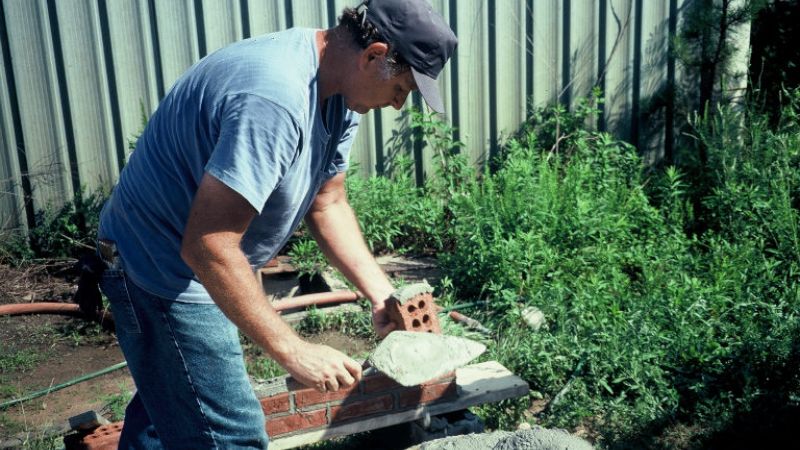
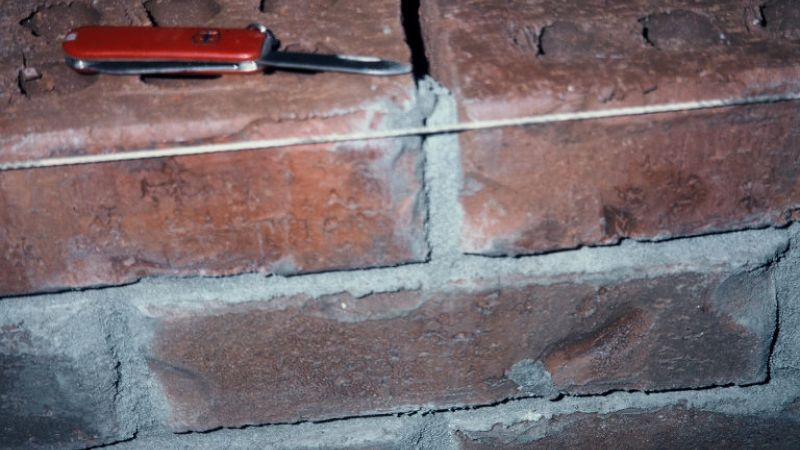
A classic, typical example of a non-full brick head joint can be seen below. Figure 1 shows the mason applying mortar to the head of the brick. Figure 2 shows the “as-installed” brick and joint. I call this a “clip-joint” where only the outer ½” - ¾” or so of the brick receives mortar. The cosmetic appearance of the finished wall looks good. But there are hidden problems. When it comes time for the mason to run his jointing tool on the joint, instead of the compacting and densifying action that is supposed to be accomplished, the mortar in the clip-joint can actually be pushed back, breaking the initial bond that had formed between the brick and mortar….a perfect beginning for a leak. Remember, the function of mortar is to bond all of the bricks together for strength and water tightness.


Bed joints for block walls:

The Portland Cement association discusses two types of mortar bedding: full and face shell.
Full bed mortar bedding: the webs, ends and face shells are bedded in mortar. This is usually used for the first or starter course on a footing. As a side note it can also be used for work where the wall is to be partially grouted.
Face shell bedding: it is common practice to use this type of bedding for all other hollow concrete masonry unit construction, where a full bed of mortar is applied onto the top of the face shell
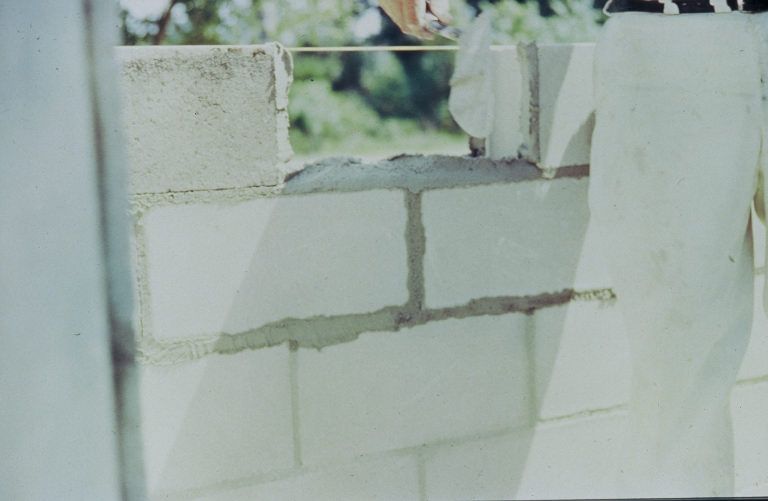
Head joints for block: a full width of mortar is applied to the ends of the face shell. Some masons apply the mortar to the ends already in place while others stand the block vertically and apply the mortar to the end. Regardless of the procedure, a full width of mortar is required.
To conclude: use plenty of mortar in the joints and avoid mortar void areas. And remember, an important purpose of the jointing tool is to compact and densify the mortar joint, making it as water tight as possible.